If you’ve reached the point in your Minecraft world where you have chests scattered across your base like a disorganized warehouse, it’s time to step up your storage game. A Simple Storage Network transforms how you manage inventory, letting you access all your items from one unified system. Instead of running between multiple chests hunting for that one stack of iron you definitely stored somewhere, you’ll have instant access to everything with a few clicks. Whether you’re playing vanilla+ with mods or tackling late-game resource management, setting up a storage network is one of the best quality-of-life improvements you can make. This guide covers everything you need to build, expand, and optimize your Simple Storage Network from day one.
Key Takeaways
- A Simple Storage Network in Minecraft centralizes scattered chest storage into a single unified system, eliminating inventory hunts and saving hours of frustration during gameplay.
- Set up a Simple Storage Network by placing a Storage Core Unit, connecting storage cable to chests or barrels, and adding a Storage Request Table for instant item access from anywhere.
- Storage Networks automatically sort items without manual organization, scale infinitely as your base grows, and integrate with crafting systems to automate bulk material processing.
- Logical organization—categorizing storage by material type and labeling containers—is essential for maximizing efficiency and preventing chaos in larger networks.
- Wireless Handsets and Expansion Nodes extend your network’s range and accessibility, enabling mobile inventory management across multiple chunks or mega-bases without signal loss.
- Regular purging of junk items, splitting networks by purpose, and using larger storage containers like barrels optimize performance and prevent lag in long-running worlds.
What Is a Simple Storage Network in Minecraft?
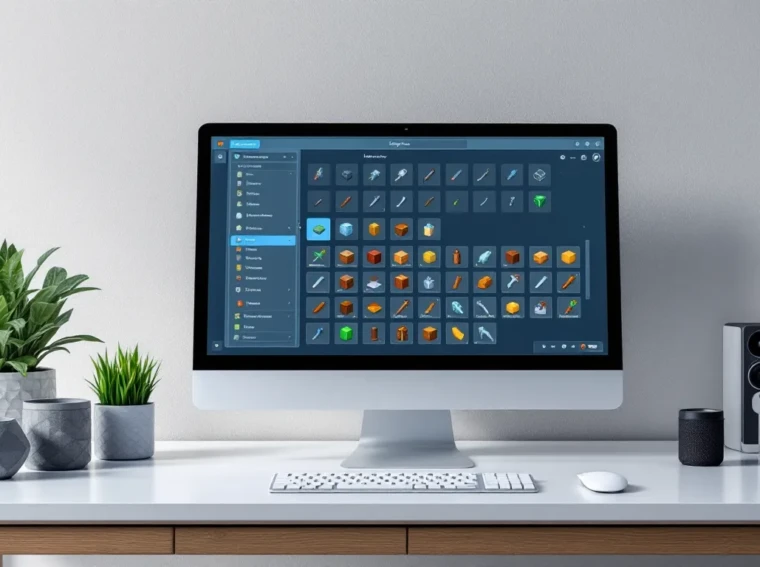
A Simple Storage Network (SSN) is a mod that centralizes item storage in Minecraft. Instead of managing dozens of separate chests, you create a networked system where all connected storage blocks sync to a single access point. Think of it as a digital inventory hub, you request items, and the network retrieves them instantly.
The core mechanic revolves around connecting cables to storage blocks (chests, barrels, drawers, etc.) and accessing them through a Storage Request Table or wireless handset. Items automatically sort into their designated storage slots, and you can view everything you have at a glance. The mod handles the logistics: you just need to set it up right.
What makes SSN different from other storage systems is its simplicity and flexibility. Unlike more complex alternatives, you don’t need to micromanage channels or worry about excessive wiring complexity. It’s straightforward enough for casual players but scalable enough for massive end-game operations with thousands of stacks.
Why Use a Storage Network Instead of Chests?
Single-chest storage dies fast. Once you’ve got even 20-30 chests scattered around, finding items becomes a scavenger hunt. A storage network eliminates that friction entirely.
Convenience and Speed: Request a block of diamond ore, and it appears in your inventory instantly. No more digging through multiple double chests. Time saved compounds when you’re constantly pulling materials for building, smelting, or crafting.
Organization Without Effort: The network automatically sorts items into designated storage blocks. You don’t manually organize, the system does it for you. Items flow where they belong, and you always know where to find them.
Space Efficiency: A network with 10 connected chests takes up far less mental real estate than remembering which chest holds what. Your base stays visually cleaner, and you can dedicate more space to actual builds instead of sprawling storage areas.
Scalability: Need to add 50 more chests? Just connect them to the network. The system adapts without requiring a complete rebuild. Expansion is painless.
Crafting Integration: Advanced setups let you craft directly from stored materials using Request Tables. Want to make 64 iron ingots? The network pulls raw materials and hands you the finished product. It’s automation without the complexity of full-scale redstone contraptions.
Essential Materials and Prerequisites
Required Items and Blocks
Before you start building, gather these core components:
- Storage Cable: The backbone of your network. Connects all blocks together and transmits item data.
- Storage Request Table: Your primary access point. Place items here to request them from the network.
- Storage Core Unit (sometimes called Storage Master or Controller): The network’s brain. One per network.
- Expansion Nodes: Optional blocks that expand your network’s capacity and range.
- Storage Blocks: Any block that holds items. Chests, barrels, hoppers, item frames with storage mods, drawers (if using compatible mods).
- Wireless Handset (optional): Lets you access the network from anywhere without standing at the Request Table.
You’ll also want basic crafting materials: Iron Ingots, Redstone Dust, Glass, and Wood (for crafting frames and cable components).
Where to Find or Craft Components
All SSN components are crafted at a crafting table. The exact recipes depend on which version of the mod you’re running (SSN has multiple versions across different modpacks).
General crafting patterns:
- Storage Cable: Usually requires Iron Ingots, Redstone, and Glass. Shaped into a cross or line pattern.
- Storage Core Unit: Typically demands a Crafting Table, Chest, and several Iron Ingots arranged in a specific pattern.
- Request Table: Crafted from Wood, Iron, a Chest, and Redstone components.
For specific recipes, check your modpack’s documentation or use mod guides on platforms that compile detailed walkthroughs. If you’re unsure, hovering over items in JEI (Just Enough Items) or NEI (Not Enough Items) will show exact recipes.
You don’t need rare materials like diamonds or obsidian, SSN is designed to be accessible early-to-mid game. Plan to gather these materials once you’ve got basic iron farming or mining setup.
Building Your First Simple Storage Network
Step 1: Create the Core Storage Unit
Place your Storage Core Unit in a dedicated location. This is the heart of your network, all cables and expansions connect to it. Choose a spot that’s:
- Central to your base (or at least accessible)
- Protected from player accidents
- Visually distinct so you don’t accidentally build over it
Right-click the Core Unit to open its interface. You’ll see network status, connected devices, and storage capacity. Make sure the unit shows as “Active” before proceeding. If it doesn’t, check your version’s crafting recipe, you may have built it incorrectly.
Step 2: Connect Cable and Expansion Nodes
Place Storage Cable adjacent to the Core Unit, then extend it in any direction toward your storage blocks. Cable doesn’t care about direction, it’s not like redstone. You can go horizontally, vertically, diagonally across your base.
Connect your first storage block (chest, barrel, etc.) at the end of the cable or branching off it. Right-click the connected storage block: if it highlights and shows in the Core Unit’s interface, you’ve got a connection.
Expansion Nodes boost range and storage capacity. Attach them to the cable network like you would storage blocks. Nodes work best placed at intervals along long cable runs, they act as signal boosters. If your network suddenly disconnects when you’re far from the Core Unit, add an Expansion Node to extend range.
Pro tip: Cable itself doesn’t consume network space. You can route it anywhere without penalty. Hide it in walls, under floors, or alongside other utilities, it doesn’t matter mechanically.
Step 3: Add Storage Blocks and Configure Channels
Connect multiple storage blocks to your cable network. Each connection acts as a “channel.” Most versions of SSN let you connect 16-32 blocks per single cable line, though this varies by modpack.
Once blocks are connected:
- Check the Core Unit’s interface to verify all blocks appear in the device list.
- Place a Storage Request Table somewhere accessible, often near your crafting area.
- Right-click the Request Table to open the network interface. You should see all items from all connected storage blocks listed here.
- Test by requesting an item. If it appears in your inventory, the network is working.
If a storage block doesn’t appear, check:
- Is the cable actually touching the block?
- Is the block a valid storage type (SSN might not recognize modded storage from certain mods)?
- Are you exceeding channel limits? Some versions require you to use Advanced Cable for larger networks.
Advanced Features and Customization
Request Tables and Crafting Integration
The Storage Request Table is more than just a retrieval tool. Advanced setups use it for crafting automation.
Place a Request Table adjacent to a crafting table or modded crafting block. The network can pull items directly from storage and feed them into crafting recipes. Set up a recipe once, and the network remembers it. Request the final product (e.g., “Smooth Stone”), and it automatically:
- Pulls raw materials from storage
- Feeds them to the crafting block
- Collects the result
- Returns excess materials to storage
This is particularly powerful for bulk crafting. Instead of manually crafting 64 stacks of items, you request them in batch, and the network handles production.
Some modpacks include Advanced Crafting Tables that integrate directly with Request Tables, automating complex multi-step recipes. This requires more setup but saves enormous amounts of time in late-game material processing.
Wireless Access and Extended Range
The Wireless Handset is a quality-of-life upgrade that lets you access your storage from anywhere in the world. Craft a handset, link it to your Core Unit, and you’ve got mobile inventory management.
Wireless range depends on your modpack’s config. Some versions offer unlimited range: others limit it to a specific distance (often 256 blocks or a full chunk). Check your modpack’s documentation for specifics.
Extended Range Setup:
If your base spans multiple chunks, use multiple Expansion Nodes strategically placed between your Core Unit and remote storage areas. Each node doubles or triples effective range, letting you connect distant storage without signal loss.
Alternatively, set up satellite networks, multiple smaller networks in different areas that sync via Network Bridges (if your modpack supports them). This is more complex but useful for mega-bases with storage scattered across multiple locations.
Wireless handsets consume durability over time (usually). Repair them with materials used in the handset’s recipe, typically Iron Ingots and Redstone. Or disable durability entirely in config files if your server/modpack allows it.
Troubleshooting Common Issues
Network Connection Problems
Blocks won’t connect or disappear from the network: Check your cable routing. SSN cable requires a direct line of connection, no gaps. If cable is fragmented or a block is placed blocking the path, the connection breaks. Use the Core Unit’s interface to verify which blocks show as connected.
Network keeps disconnecting: You’re likely exceeding channel capacity. Most versions support 16-32 connected devices per cable. If you’ve hit the limit, add a second cable line from the Core Unit or use Advanced Cable (available in some modpack versions) to expand capacity.
Core Unit shows “Inactive”: The Core Unit itself may be broken. Destroy it and craft a new one. Alternatively, restart your game or reload the chunk, sometimes the block fails to initialize properly on world load.
Items aren’t auto-sorting into storage: This is usually intentional, you may need to configure which storage block receives which items. Some versions of SSN require you to label storage blocks or set “priority.” Check the mod’s GUI for storage block options.
Storage Capacity and Performance Optimization
Feeling lag spikes when accessing large networks: SSN can become performance-heavy if you’re storing tens of thousands of stacks. Optimize by:
- Limiting stored item types: Don’t keep 10 different types of dirt blocks or gravel. Consolidate raw materials.
- Clearing junk: Delete useless drops (stone, sand, dirt accumulation). Every item tracked adds minimal overhead, but thousands add up.
- Splitting networks: Create separate networks for different purposes (one for raw ores, one for crafted goods, one for building blocks). This reduces the number of items in any single Core Unit’s view.
Storage blocks are full but network shows space available: You’ve hit the physical block capacity, not the network’s data capacity. Add more storage blocks. Each standard chest holds 27 stacks: barrels hold 64. Use larger containers (barrels) to maximize physical storage per block.
Request Table is slow or unresponsive: If you’re requesting items from very far away (thousands of blocks), network latency might create lag. This is rare but can happen in extreme mega-bases. Adding more Expansion Nodes in strategic locations improves responsiveness by reducing data-travel distance.
Can’t find an item you know you stored: Check if the item is in the “Junk Slot” or misrouted. Some versions let items fall into catch-all categories. Manually move them to appropriate storage, then the network learns the correct location.
Best Practices for Efficient Organization
Organization is where a storage network truly shines, and where chaos begins if you’re not disciplined.
Categorize storage logically: Dedicate chests or barrel groups to specific material types. One section for ores, one for ingots, one for building blocks, one for enchanted gear, one for consumables (food, potions). This mental model makes retrieval instant because you know conceptually where things go.
Label your storage blocks: Use Name Tags or write on Signs placed next to storage blocks. “Ores,” “Ingots,” “Wood,” “Building Blocks.” This helps you and anyone else on a server understand the organization at a glance. It also prevents you from accidentally connecting a new storage block to the wrong category.
Use storage block hierarchy: Place smaller containers (chests, small barrels) at the Request Table for items you access frequently (tools, crafting materials, armor). Place larger containers (double chests, large barrels) deeper in the network for bulk storage of less-frequently-used items (stacks of stone, dirt, sand).
Establish a “Temp” or “Processing” chest: Keep one chest near your crafting area for items currently in-use or being sorted. Once you’re done with a project, return items to main storage. This prevents clutter in the primary network.
Purge regularly: Every few in-game days, spend 10 minutes clearing garbage from your storage, broken tools, partial stacks of random blocks, duplicates. A clean network is efficient and reduces lag.
Use storage drawers (if available): Modpacks often include Storage Drawers alongside SSN. Drawers hold one item type each but with massive capacity. They integrate seamlessly with SSN and create a cleaner visual aesthetic than mixed chests. Drawers are ideal for your primary material types (wood, stone, ores, ingots, etc.).
Document your layout: If you’re playing in a long-running world or with others, keeping notes on what’s in which section prevents the frustration of forgotten organization. A simple document or sign in-game works.
Plan for expansion: Don’t pack your storage area so tightly that adding new chests later is impossible. Leave gaps between storage sections so you can plug in new blocks as your collection grows. You’ll thank yourself when you suddenly need 5 more chests for a new farming setup.
Conclusion
A Simple Storage Network transforms Minecraft from a game where you hunt through 50 chests to one where you instantly access everything you need. The setup is straightforward: place a Core Unit, run cable to your storage, add a Request Table, and you’re done. From there, it scales infinitely.
The real power comes from intentional organization. A well-planned network saves hours of frustration and lets you focus on what makes Minecraft fun, building, exploring, and progressing, instead of item management tedium.
Whether you’re running a small survival world or a sprawling server, SSN is one of the highest-value mods you can install. Start simple with one core network and a handful of chests, then expand as your needs grow. The knowledge you’ve gained here covers everything from basic setup through advanced wireless access and optimization.
Your chaotic chest situation is about to get a lot more organized.